
|
This year has brought many schedule changes. Shows were cancelled and others moved to a virtual environment. There were difficult decisions that had to be made about whether or not to participate in the new format of those shows. This year my kids decided to forgo the online shows and wait for the in person shows to start back up. Fall and winter shows are new to our schedule. We've been wanting to start showing at more shows than just the County Fair and the State fair, so we're hoping the opportunity will be there to safely show. Recently the Illinois Department of Agriculture has announced since the State Fair was canceled they will host a Junior Livestock Expo over two weekends in September. The boys are very excited for the opportunity to show. Over the next few weeks we'll ramp up the work with the goats and get them ready for work in the show ring. Stay posted to see updated from the show prep and the shows! Until then enjoy the slideshow below of the goats.
0 Comments
 From Left to Right: Youngest to Oldest: Hershey, Mini Pearl, Double Stuffed Oreo From Left to Right: Youngest to Oldest: Hershey, Mini Pearl, Double Stuffed Oreo If you've been following us on Facebook, you know that we've been impatiently waiting for Myrtle to have her kids. I took her to Greenville Vet Clinic on Valentine's day for an ultrasound to see if we could figure out when she'd be do and how many kids to expect. This is her first time kidding so I wanted to be as prepared as possible. Boer goats are known for being easy kidders with good mothering instincts. But she was also the only doe we had bred last fall, so I was nervous about her being the only expectant mother. Turns out I had nothing to worry about. Towards the end of her pregnancy She was huge! And pretty much didn't want to do anything that would require her to walk more than to the other side of her birthing pen. I noticed her feet seemed to be swelling and got nervous enough to call and make a vet appointment for April 15th. I figured since she was my first pregnant goat, I've lambed before and it's a very similar process, and she was a first time mom, it would be a good idea just to check. We still had 2 weeks to go before she was due so there was a chunk of time we still had to make it through. On April 14th I sent Colten out to do morning chores. This included making bottles for his Show wethers, and Wyatt;s new goat Cookie. Making sure the hay feeder was filled, and the goats all had clean fresh water. Part of his chores were checking on Myrtle to make sure there were no signs of labor or distress. After spending time with the goats he reported in at 10 am that everything was fine in the goat barn, Myrtle was still laying down but no obvious signs of labor. We talked about what the best method would be to get her loaded to go to town for her vet appointment the next morning, then went about our day. Evening chores roll around and I again send Colten out to do the goat chores, along with Wyatt. Evening chores include graining the goats and that can be hectic when you've also got to bottle feed the babies. Ten minutes hadn't even passed when I heard Colten yelling "Mom, Mom, Babies, Babies." I waited for him to get closer before I asked "What's wrong with the babies?" thinking he was talking about the bottle babies we have, they can get themselves into trouble. I was shocked when he responded "Myrtle, she has babies, two babies!" So we got our barn clothes on and headed out to see what was happening. The goat barn is not far from the house and in the less than 10 minutes it took for Colten to come get us and head back there was a third kid on the ground, still wet and Momma was doing her best to clean them all up. I immediately called my goat mentor, Uncle Bill, and told him the good news and asked what things I should be doing for the new mom and kids. We sat and watched them for the first couple of hours learning to walk, and making sure they were breathing and most importantly that they each figured out how to nurse. We were very excited to see that all 3 kids were does, as this meant we'd be able to keep them in our herd and it had now doubled in does! These does will also be registered as the farms first registered Boer goat kids! The oldest doe is a black-headed doe named Double Stuffed Oreo. The middle doe is another black-headed doe with a broken white stripe down the back of her head named Mini Pearl. The youngest doe is the chocolate-headed doe named Hershey. We cancelled the first vet appointment and had the vet come out the following week. He was super impressed with the size and health of the babies, and said as long as we still see growth we won't have to worry about bottle feeding them. So far Myrtle is doing great, they all nurse and they are all gaining! Keep your fingers crossed she can raise them to weaning! We're expecting great things from these girls! After taking the latter part of 2019 off and evaluating what we want to accomplish as a family farm we're back! Attempting to make a go with various kinds of poultry has made it very clear our land won't support the kind of farming required to make it as a poultry farm. Even the quails were starting to become challenging. We recognized in order to be the kind of farmer's we wanted to be we'd have to take our farm in a different direction. Our inspiration was found in our boys 4H projects. Goats fit our farm well. They are designed for hilly terrain, and love to eat the browse that is very abundant on most of our acreage. So it was decided to start working on our goat herds. Since Colten had already started showing Boer goats in 4H, and knowing there is a good market for them here, we knew we'd be growing his herd for show, work and meat. My younger son Wyatt wanted goats as well but wanted to have his own breed. He talked us into Nubians, a great dual purpose breed, they produce both milk and meat and can be crossed easily with the Boer goats for additional work qualities. With the additions of the Nubians we will be exploring home made soaps and lotions, and possibly down the road our own little mini dairy. We'd like to invite you to spend time with us as we start this journey and would like to share it with you! 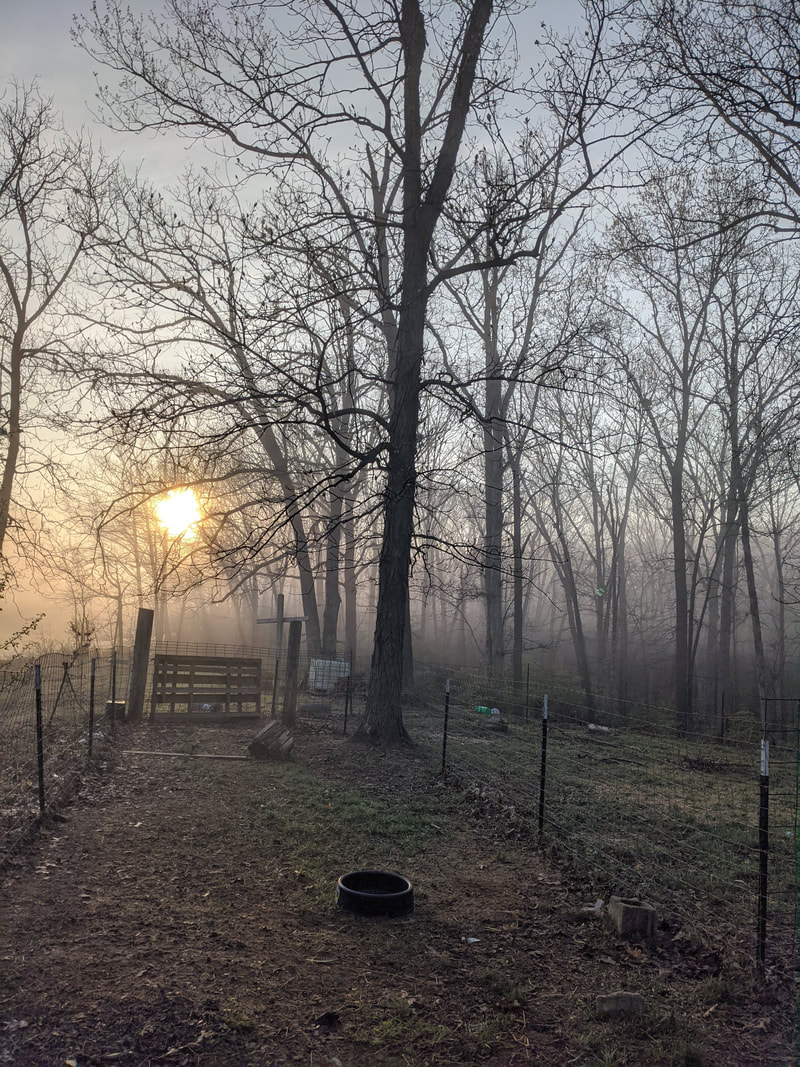 The view from our goat barn on a foggy Spring morning. April 2020  Mischief our Boer wether enjoying the green grass in the goat field. Mischief our Boer wether enjoying the green grass in the goat field. April has been a very wet month. The farm is greener, the animals are all starting their summer shed and slim down, the frogs are back to singing nightly in our pond, life is great. The kids are starting to count down the days till the end of the school year and things are picking up for our summer shows and vacation plans. This month we've been rearranging animals and their pens. Now that the nights are warmer we can start to move some of the birds out to their summer pasture homes. My sons are both heavily involved with showing in 4H and they each have goats they show. My oldest son shows Boer goats, a type of meat breed, and the youngest shows Nubians, a diary breed. The Nubians are new additions this spring and are our first experience with bottle feeding goat kids. I've been very proud of the way Wyatt has stepped up and taken them on. In addition to their goats they each also show one other species, Colten shows Rabbits, and Wyatt shows ducks. Currently we are starting our summer breeding of rabbits for both showing and the farmer's market so stay tuned for updates on bunnies! The ducks are living in my quail brooder, and it's time for them to be out on the pasture, once they get more feathers we'll start introducing them to the pond during the day and putting them in their enclosure at night. They will have an enclosed area in the goat field that will be close to the pond for easy access but provide protection and a place to be out of the weather. Once we get the ducks out of the brooder I'll be able to bring the last batch of Quail out to the brooder. We'll also be starting the build for the grow out pens in the next week or two. Can't wait to start getting our quail out on dirt. instead of putting the grow outs in the goat field like we've done for both rabbit grow outs and Chickens, we'll be putting the quail in a new location. They will be going out under the trees. This area is more dirt than grass, and is full of seeds and insects. We hope this will help them forage more for their food and provide shade that will help keep them cooler in the summer months.  We had a blast coloring the quail eggs for Easter! They are quickly becoming a family favorite. We had a blast coloring the quail eggs for Easter! They are quickly becoming a family favorite. Easter was gorgeous at our farm. The weather couldn't have been more perfect. We were able to spend the whole weekend outside. We explored the woods and took the goats for a long walk in the woods to give them a chance to explore as well. We dyed both quail eggs and chicken eggs. The dyed quail eggs always remind me of those candy robin eggs. With the girls laying so well we were able to dye just under 3 dozen quail eggs! If you haven't tried dying quail eggs yet I highly recommend it! Speaking of the girls laying, one day this month we were able to collect 34 eggs! It was incredible. That collection was the last one before setting our next batch of eggs in the incubator. So more quail chicks will becoming soon! Can't wait to see what next month brings to the farm. What are you looking most forward to for May? Comment below. Don't forget to sign up for our mailing list. You'll be the first to know what days we'll be at the market, what items we'll have available as well as other tid bits of information pertaining to the farm. Just click the button below!  Quail eggs surrounded by Chicken eggs. They all have different characteristics and colors. Quail eggs surrounded by Chicken eggs. They all have different characteristics and colors. All girl birds lay eggs. At least all the girl birds I know about do. Have you ever wondered just how these birds make these eggs? I did until I looked it up and I want to share what I learned with you. First let me get one question out of the way. NO, you do not have to have a rooster to get eggs from a female bird. Especially in birds that have been domesticated for egg laying. Each breed/ species has it's own timing but typically birds lay about one egg a day. Some lay year round, and others are seasonal. But you'll get roughly an egg a day even if you don't have a rooster. Eggs are created in the ovary and oviduct of the female bird. All eggs start out as yolks. The yellow part in the middle of an egg. This yolk is produced in the ovary and contains all the nutrients that a chick will need to develop. Once the yolk (Ovum) is mature enough to be fertilized and turned into an egg it is released into the Oviduct. If the egg is going to be fertilized it will happen soon after the yolk is deposited into the oviduct. As the yolk travels down this long tube the other parts of the egg are added around the yolk with the shell colors being the last to be applied. The next part of the egg to be added is the albumen. The white part that helps cushion the yolk, provides protein to the developing chick, if fertilized, and what you whip up to create Meringue. After the whites are added to the yolk a strong, but soft membrane, is added around the eggs. This is the beginning of the egg shape, and is the filmy layer that often comes off with the shell when you're peeling hard boiled eggs.  Examples of different patterns of egg colors laid by Peaks N Plains Farm Quail Hens. Examples of different patterns of egg colors laid by Peaks N Plains Farm Quail Hens. At the very end of the oviduct is the shell gland. This glad is responsible for adding the hard outer shell of the egg and applying the different colors you find in the shell as well as on the outside of the shell. Sometimes when an egg is very fresh or has dirt really stuck to the shell, the color can be rubbed off during the wash process. This amazing process takes anywhere from 20-36 hours each day. The hens can somewhat control the release of the eggs and this is heavily dependent on the amount of light received each day. The more light hours a bird is exposed to the less time between lay of one days egg and the release of the next yolk. This is one reason why hens typically slow their laying down or quit completely in the winter time. It's still amazing to me what these little artists are able to make in just one 24 hour period! 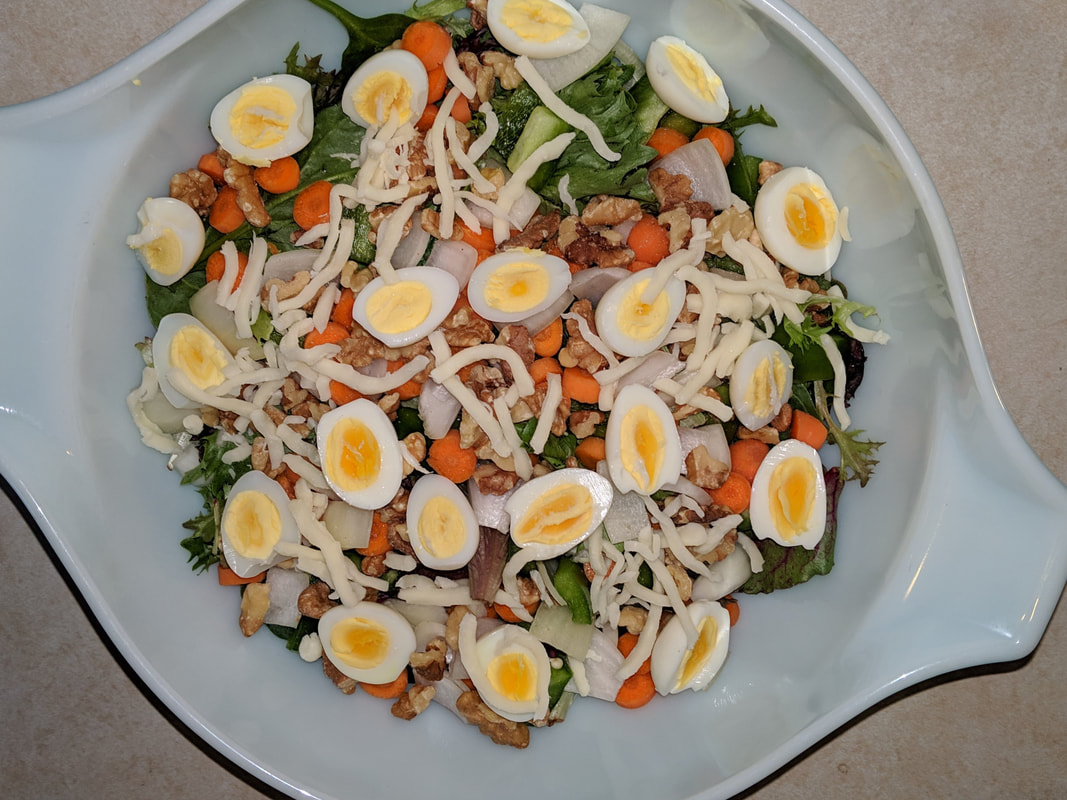 Spring is here! Or at least mostly here. One of my favorite things to eat in Spring is salad. Salad is such a good way to eat fresh and eat a variety of local foods. I can't wait till May 11, 2019 when The Land of Goshen Farmer's Market Season starts back up.
Until then I'll have to make due with the things I can find at our local Walmart. I recently purchased a tub of spring greens. This mix is my favorite mix to make salads with. To that we added green peppers, carrots, onions, walnuts and of course we topped it with hard boiled quail eggs halved. I love the way the eggs look, and they make the perfect addition since they are a great source of bite sized protein. We topped our salad with Robert Irvine's Maple White Balsamic Vinaigrette. It was super delicious and I think I'll be making a batch of it to take to our next potluck. What's your favorite salad topping? Comment below!  This is one of my favorite flowers! A Crocus. I love these flowers as they are the first to bloom and are my favorite color Purple! This is one of my favorite flowers! A Crocus. I love these flowers as they are the first to bloom and are my favorite color Purple! March sure has seemed to fly right on by! It seems as the weather started to warm up my calendar has started to fill up! I am busy with 4H meetings, not only do I help lead our local city club, I also lead a SPIN club for rabbits, and sit on a few boards and foundations linked to our county 4H! It's been a busy month of meetings! We also managed to squeeze in a rabbit show. Not only have we been busy with off farm activities and obligations, we've also managed to get quite a lot done on the farm. We've been experimenting with different ways to use quail eggs in our dinners and get togethers. We've also been busy in the incubator! We've had two successful hatches already this year and our breeding quail pen is up to almost 40 birds total! With this last batch we're hoping to add another 12-15 hens. Our plan is to keep incubating until we reach 100 in our breeding/egg pens and then we'll start incubating for meat birds.
If you see a recipe you want to try and need some quail eggs make sure you sign up to join our wait list. This will put you on our email list and you'll be the first to hear when we have quail eggs available, and where you'll be able to pick them up! If you have been around Farm eggs (be it chicken, quail, or duck eggs) for any amount of time then you've probably heard of the Float Test. The Float Test is supposed to help you determine if an egg has gone "bad." You do this by placing an egg in a container of water deep enough there is a significant amount of water covering the eggs that land on the bottom. According to this test if an egg floats it means the egg has gone "bad." In this case "bad" is used to mean unsafe to eat. This isn't quite the case as I'll teach you below. A floating egg is just an egg that might be older, but has a bigger air pocket and allows the egg to float. This may be in indication of a lower quality egg but cannot be a diagnosis of a "bad" egg. Why They Float or Don't Found on https://www.chemistryviews.org/ Found on https://www.chemistryviews.org/ To understand what the mechanics of this test you have to know the parts of an egg. Looking at the diagram to the left I found on chemistryviews.org websites page about hard boiled eggs, you can see at the very bottom of the egg the air pocket. This is important for the float test. Each day after the egg is laid moisture is lost through the shell of the egg. This moisture loss increases the size of the air pocket. The bigger the air pocket the more likely the egg will be to float. This can be used to tell how fresh an egg is but not always, some new hens and some older hens may have eggs with air pockets large enough to allow an egg to partially float even though it is a freshly laid egg. Also in graded eggs the USDA has determined that an egg that is graded as A can maintain this grading quality for 45 days after the initial grading has taken place (this is chicken eggs but quail eggs would be similar probably 30 days.) Egg SafetyNext we should discuss what makes an egg "bad." The big bad scary thing that is mentioned when talking about food safety and eggs is salmonella. Quail eggs have a high amount of Lysozyme- an antimicrobial enzyme. This enzyme inhibits salmonella, and prevents it from growing in quail eggs. But in chickens it can be a concern. The only way I know to check to see if an egg has been infected for 100% certain is to crack the egg and take a look inside. Anyone who has visited any geyser or mud pit knows what sulpher smells like, this is often referred to as the rotten egg smell. If you crack a rotten egg no matter the species you will know right away. Candling is a way to tell without cracking the egg but depending on the color of the egg, how bright your candling light is, and your experience it can be difficult to tell. I again refer you to the USDA egg grading manual linked above, to see how to tell what a bad egg looks like. So What Does This Mean for Me?Quail eggs as long as they are clean, and refrigerated are a safe source of protein and other nutrients. They are safe from salmonella naturally since they carry a high amount of Lysozyme. The Float Test can really only tell you how big the air pocket in an egg is. The older the egg, the bigger the air pocket. The older the egg the lower the quality of egg, so it may be harder to whip whites into peaks, or it might not hold your meatloaf together as well as it normally would. The only way to tell for certain if an egg has gone bad is to crack it open and see, candling is a good second, but takes equipment and experience. As always IF YOU ARE UNCERTAIN IT IS ALWAYS BETTER TO TOSS IT OUT!!!! Your health should come first always.
If you’ve read the post on how we got started with quail you know that it wasn’t exactly planned. Not only had we never had quail before, but I’d never even eaten a quail egg! I had thought at first they might be the same thing as a Cornish hen, but a quick google search proved that theory wrong. Over the last year one of the things I’ve enjoyed the most is being able to experiment with different ways to use quail eggs. I must admit I haven’t had many opportunities to experiment till this winter. All of last year it was my goal to increase the size of our flock of quail so if we weren’t selling the eggs we were incubating them. I’m so excited for this month, by the end of this month I should have over 30 hens in my laying group! That means I should be getting roughly 2 dozen eggs most days. That will give me plenty to experiment with, incubate, and more than enough left over to share with you! Have you ever heard of Scotch Eggs? It’s probably the number one search result when you look for quail egg recipes online. I had read over a few, and thought I should try it out with my own family. Well we didn’t have ground sausage like most recipes called for, so instead of following those recipes I figured I'd make my own dish based on Scotch Eggs. It wasn’t bad, but let me tell you I’ll be looking for a real recipe to follow the next time.  Here is the result! The family all agreed, they weren't bad, but no one was wanting them again the next night!
I used hamburger in place of the sausage, seasoned it with bread crumbs, salt and pepper and a little Worcestershire sauce. Put a thin layer around hard boiled quail eggs and popped them in a 350 degree oven for 15 minutes to finish cooking. You can tell I didn't account for shrinkage when the meat was cooking and that resulted in the eggs popping out as the meat cooked down. I also think having the eggs soft boiled rather than hard would've been nice as well. Then you could have a slightly runny yolk, which I think makes everything better. What would you have done differently?Please let me know in the comments section below. And if you'd like your own dozen quail eggs to experiment with please email me and ask about availability.  Last weekend we had a great meal the whole family enjoyed. It was one of those meals where I was tired of the same old thing, and wanted to do something tasty, fun and most important EASY! If you've been friends with us for very long you quickly realize my husband is the chef of the family. I bake (everything but bread) and am known for my one pot wonder meals! It was Friday on my way home from a slow day at work. I was already on weekend mode, but wanted to cook something. I stopped by DK's Market in Hamel, IL. I small grocery store I pass everyday on my way home from work, to pick up a few things. This little store is your typical small town grocery store, it's got everything, just not in the same quantities as the bigger stores. One thing I love about this store is it still has it's butcher counter by the meats. The meat there is great and they still have the guys in the white hats to help you out of pinch. Often when I don't know what to cook for dinner I'll stop by and see what looks good. Last Friday it was the Top Round Steak. I had no idea what to do with it, but decided on Stir Fry. Keep reading for the recipe I made that was a huge hit with my family. Ingredients List: 1 lb or more Top Round Steak Teriyako Merinade 1 doz. PNP farm Quail Eggs Garlic to taste 1 green pepper Salt & Pepper to taste 1/2 med. Onion White Rice 1 sm. head of cauliflower 1 cup sliced carrots  First I cut the steak into 1/4 inch strips along the bias. I then covered them in the Teriyaki marinade and left them in the refrigerator for an hour. While the meat was marinating I started cutting up the vegetables. I cut the green pepper and onion into long strips and put them together in a bowl. In another bowl I put the carrots and cauliflower I had cut up. The carrots were also cut diagonally into 1/4 in thick slices. the cauliflower was cut into flat pieces. This allowed the carrots and cauliflower to be cooked at same time.  After the vegetables were cut and ready to go I put the water on to boil the quail eggs. If you haven't ever cooked with quail eggs before check out this blog post about boiling quail eggs here. For this recipe I used a dozen quail eggs and left them whole. Prep is done and it's time to cook. I started out by heating up a cast iron skillet ( I love these and pretty much cook everything in one if possible). I used sesame oil since it's the traditional oil in stir fries. (Now would be a good time to mention this probably isn't a traditional stir fry, but my take on one.) Once the pan was heated I added in the meat and cooked until it was nice and brown. Once the meat was cooked through I put it in a bowl to hold over till the vegetables were done. I cooked the meat first as I wanted the flavors of the meat to help season the vegetables while they were cooking.  Next up was the carrots and the cauliflower. Since I had cut these to about the same thickness it took no time at all to get these browned. Maybe 5-7 minutes. Along with the onions and green peppers I added the garlic, salt and pepper and a little more of the marinade. After these were incorporated I added the meat back in, and cooked the rice. We had some microwave bagged rice we used for this recipe. The stir Fry was served over a nice bed of rice, and there were no leftovers. Let me know what you think of this easy meal and post pics in the comments! |
 RSS Feed
